最近几年出现了各种类型的验证码,比如滑动验证码、图片识别验证码、图像定位型验证码等等,不过大多数网站依然采用传统的数字字母型验证码,验证码对于防范暴力攻击、爬虫等有着良好的作用,如果能对验证码进行识别,那么在渗透测试过程中就可以进行暴力攻击了。
验证码识别的一般方法
Tesseract
Tesseract是Google的一款OCR软件,python的pytesseract或tesserocr库对其进行了封装,可以很方便的使用。参考:python3光学字符识别模块tesserocr与pytesseract
使用方法:
- 安装Tesseract
- 安装python库:
pip install pytesseract - 识别
|
|
对于简单的图片,Tesseract拥有不错的识别率,但对于复杂的图片则识别率较低,需要对其进行训练后才能提高识别率。
训练方法可参考:Tesseract-OCR的简单使用与训练
云平台的文字识别接口
目前各互联网公司均推出了云平台,多数均包含免费的图片识别功能,此处以百度云为例。
简单尝试可使用:https://cloud.baidu.com/product/ocr/general,但如果需要在代码中使用则需要注册百度账号,识别验证码需要使用其文字识别功能,目前(2019-03-06)通用文字识别可每日免费使用50000次,具体付费标准可参考:https://cloud.baidu.com/doc/OCR/OCR-Pricing.html。
使用方法:
- 注册百度账号后登陆 百度云平台
- 找到人工智能-文字识别,创建一款应用,可获得apikey
- 参考
http://ai.baidu.com/docs#/Auth/top可获得Access Token,有效期30天 - 识别
|
|
为了提高识别率,可以在上传前对图片进行一定的预处理,例如灰度化、二值化、增大图片像素、锐化、增大边缘等等,处理后的图片识别率会更高。
云平台相比Tesseract,其识别速度更快、识别率更高、软件更新速度更快,缺点是使用有一定的限制。
打码平台
网络上有很多的打码平台,提供付费的验证码识别服务。参考:https://www.cnblogs.com/xiao-apple36/p/8911787.html。
机器学习
如果以上方法都不能满足需求,则可尝试使用机器学习算法来训练模型,以提高识别率。传统的机器学习分类算法一般包括:K近邻、贝叶斯、逻辑回归、决策树、svm等,除此之外,现在流行的神经网络也可以用于验证码识别,神经网络一般包括:FNN-前馈神经网络,CNN-卷积神经网络,RNN-循环神经网络,RNN-递归神经网络等,其中CNN最为擅长处理图像,而深度神经网络一般是指超过3层的神经网络。
机器学习识别验证码
一般流程
使用机器学习识别验证码的一般流程如下:
|
|

数据采集
下载图片
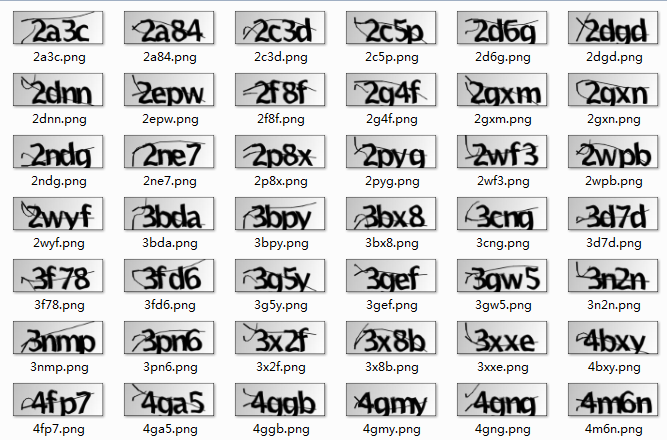
一般来说对于只有数字字母的验证码,拥有100张图片基本可以达到不错的识别效果,但如果想要提升识别率并进行验证,则可能需要下载更多的图片。为了加快下载速度,一般使用异步或多线程进行下载,这里提供一个python3.6以上版本可用的异步下载脚本,网络良好的话下载100张图片大约只需要2-3秒,下载10000张大约只需要30秒:
|
|
以上代码为从im系统中下载100张验证码图片到train_data目录中。
- 识别验证码
下载下来的图片文件名均为随机字母,而机器学习需要知道图片内容,所以这里需要手动识别所有图片,并将文件重命名,方便后续使用。
图像处理
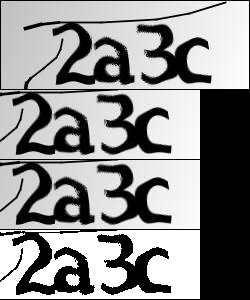
图片裁剪
一般图片都会是内容居中,并在边缘部分留出一部分空白,所以需要先把图片的这些多于部分裁剪掉,使用图片查看工具观察可以得出大致的范围,使用python的PIL可以轻松进行裁剪:
|
|
灰度化
一般图片均含有大量像素点,每一个像素点又含有2^24次方(RGB)种颜色,为了简化数据,故先对其进行灰度化处理。
灰度化,在RGB模型中,如果R=G=B时,则彩色表示一种灰度颜色,其中R=G=B的值叫灰度值,因此,灰度图像每个像素只需一个字节存放灰度值(又称强度值、亮度值),灰度范围为0-255。一般有分量法 最大值法平均值法加权平均法四种方法对彩色图像进行灰度化。
|
|
PIL只需要一行代码即可完成灰度化,灰度化只有每个像素点只含有2^8次方种颜色。
二值化
灰度化只有图片依然很复杂,故还需要进行进一步处理。二值化是根据灰度大小,将大于某个值的颜色取为白色,小于某个值则取为黑色,这个只即为阈值,阈值根据经验一般取值在100-200之间。对于白色背景的图片而言,值越大保留的有效像素越多,越小则有效像素越少。
|
|
二值化后每个像素只有2种颜色。
由于此验证码主要有黑白色构成,故灰度化不明显。且由于没有使用等宽字体,故裁剪时需注意要多留一些空白部分,以防遇到较宽的字母时将有效部分裁剪掉。
图片切割
验证码一般都是4个或6个字母在一张图片中,故还需要对图片进行切割,将各个字母分开,以便于识别。对于不同类型的验证码,需要视情况选择切割算法,一般常用的算法如下:
暴力法
直接将图片分成4份,或者如果验证码每个字母是等宽且位置固定,可通过观察获取每个字母的位置。
X轴投影
将图片横纵轴视为坐标轴,从左到右检查,当某条线上没有像素点时可认为某个字母已结束,即可作为切割点。
泛水填充法
X轴投影的升级版,对于倾斜的字母,X轴投影就无效了,泛水填充法则像流水一样,从上到下找到一条能流通的线,作为切割线
边缘检测
通过检测图像边缘,将图像分为若干个部分,对于各字母没有粘连的情况具有比较好的效果。可参考:参考资料1。
聚类
通过对图片中像素点进行聚类,也可以进行分割。当各字母间分离得比较远,字母内部比较集中的情况可以取得不错的效果。
图片切割的质量对于后续的识别有非常大的影响,一般生成验证码时为了防止图片被简单的切割,都会采用添加干扰线、倾斜、翻转、位移等方法,大大增加图片切割难度。
除了以上方法外,还有很多算法,可参考:图像分割的主要算法。
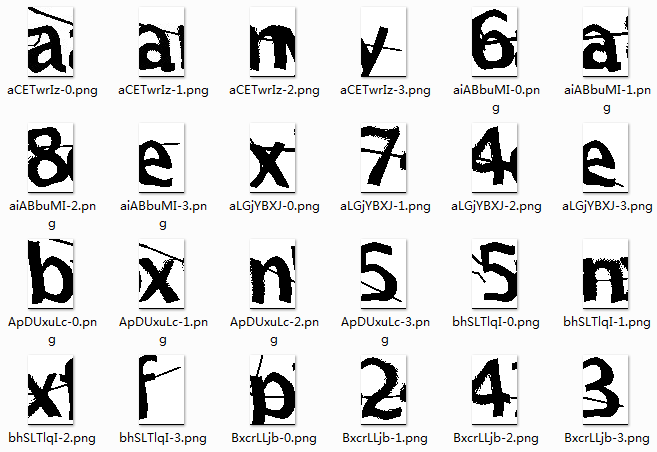
本次的验证码经过尝试,发现没有特别好的办法,故采用暴力法,直接将图片分成4份,效果如下:
开始训练
传统机器学习算法
python的sk-learn库中基本包含了目前流行的所有传统机器学习算法,以下代码基本包含了常用的算法:
|
|
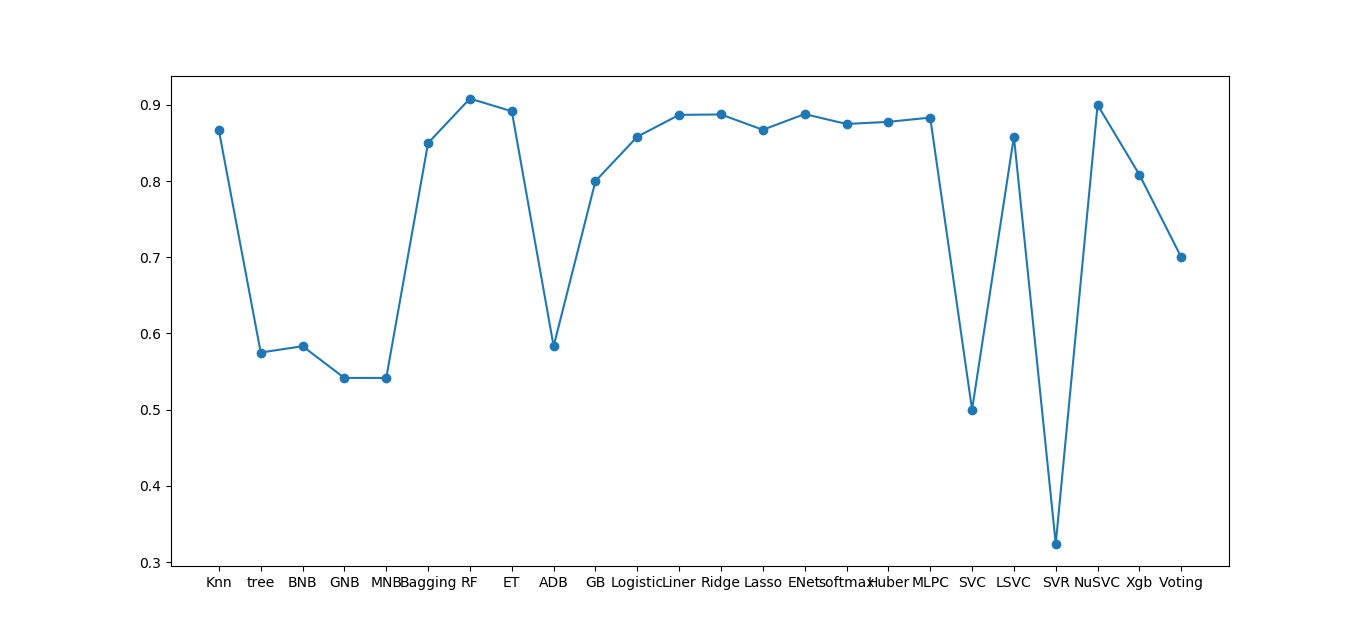
可以看到在训练集并不大的情况下,部分算法可以取得很不错的效果,但这仅仅是在本地测试,且测试的是单个字母的识别率,由于在最终使用时需要一起识别四个字母,且必须全部识别正确才算成功,故对于单个字母识别率为90%的算法,四个字母都识别正确的概率仅为0.9^4=0.66。要使最终识别率大于80%,需要单个字母识别率大于95%;要使最终识别率大于90%,则需要单个字母识别率大于98%。
要提高识别率,一般可以从以下几点着手:
- 提高图片预处理的效果
- 加大训练集的数量
- 超参数调优
- 使用多个不同的算法,最终进行投票
另外为了节约时间,可以将图片处理结果先保存下来,下次直接读取即可。
深度神经网络-FNN
传统的机器学习算法一般都能满足大多数场景的需求,但要想进一步提升识别率,可尝试使用深度神经网络。常用深度学习框架见机器学习简介。本文使用Keras框架,TensorFlow作为后端。
|
|
使用Keras可以非常快速地建立一个简单的神经网络模型,本文建立了一个12层的FNN,仅使用70余行代码,并且训练耗时大约1分钟,最终单个字母识别率可以达到95.67%。
深度神经网络-CNN
相比于全连接型的神经网络,卷积神经网络更为擅长处理图片:
|
|
CNN的训练耗时差不多也在1分钟左右,但最终的识别率为98.96%,相比于FNN有不小的提升。
在线验证
一般而言,进行本地验证时,由于数据量小,识别率相较于真实环境而言会更高,故本次以暴力破解账号密码为例进行在线验证。
在登录过程中,一般账号或密码错误会是同一个提示,而验证码错误会是另一个提示,故可以根据提示的内容判断验证码是否识别正确。
|
|
经过初步测试可以发现,识别率还不到40%,远远低于预期,这是因为训练集太小。我们可以在验证过程中将识别正确的验证码加入训练集,将识别错误的先保存起来,修改后加入训练集,逐步迭代升级模型,直到满意为止。另外还可以不断调整超参数,修改神经网络的结构,也能提高识别率。
最终将训练集大约增大到500左右,可以使最终的识别率超过80%,基本能满足需求。
总结
验证码识别是一个经典的机器学习场景,不同的算法各有其优缺点,并且大部分算法都有很大的优化空间。不过通过以上过程可以看出,神经网络相较于传统的机器学习算法还是拥有很大的优势的,实践过程中一般都需要进行多方面的对比,从而选择出满意的模型。